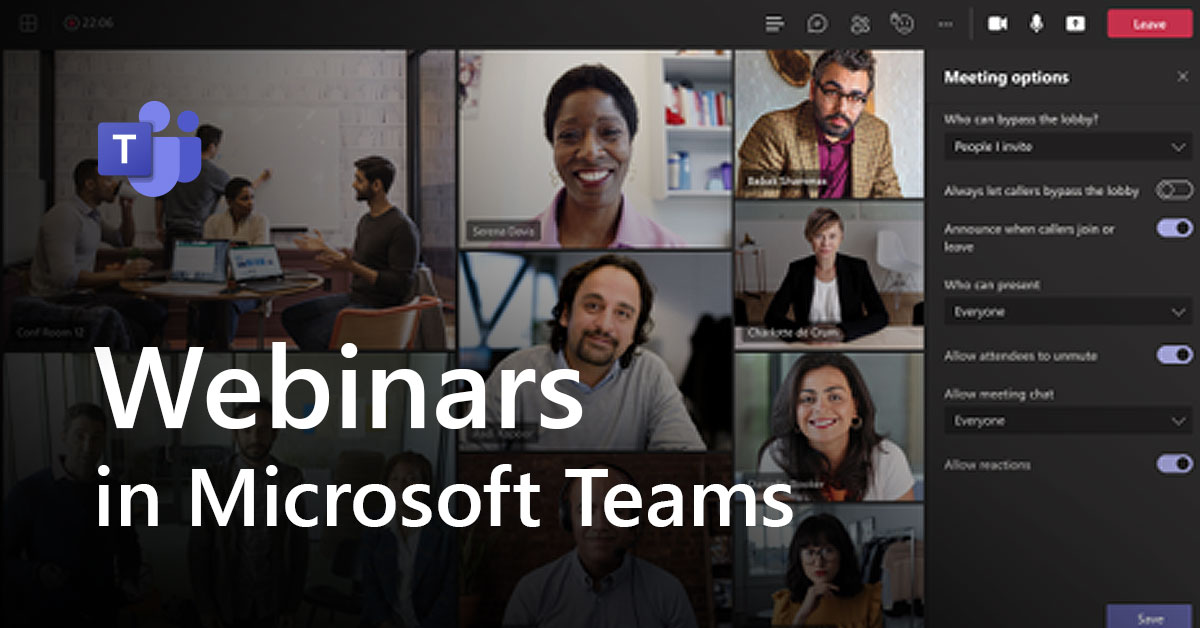
Microsoft recently introduced webinars into Teams which allows users to create a registration page for an event. The event is conducted in a live session and allows for interaction with the audience. In this article, I will be covering some of the features, functionality, and licensing constraints I found through testing. This will include how an end user sets up a Teams Webinar event as well as some of the admin settings you can use to restrict functionality.
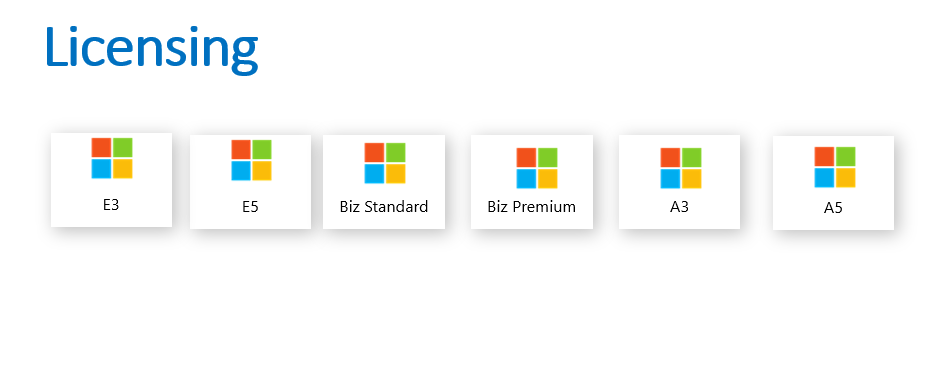
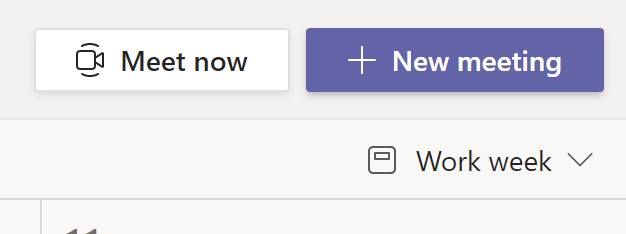
When I initially started my testing, all tutorials point to a dropdown of where you can schedule a live event from the Teams calendar view. In my test tenants, I had a Business Premium license but did not see this as an option.
What the tutorials show:
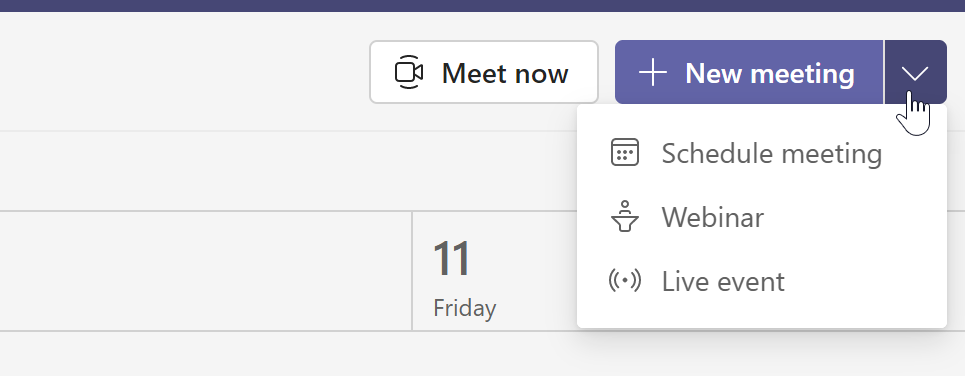
What I saw:
It turns out that this is extending the live events licensing restriction to the webinars. With that restriction, the business plans do not have this dropdown from the Teams calendar. Keep this in mind if your users ask! If you were to click on new meeting, you will be able to change the ‘Require Registration’ settings to make this a webinar event, even with the business licensing.
Setting up a Webinar
Setting up a webinar event is fairly easy. All webinar events are scheduled from the Teams calendar. There is no support for creating a webinar event in outlook at this time. A user can follow the steps seen above to click on the webinar button if they have the enterprise or non-profit licensing, or they can click on the require registration settings if they have business licensing.
When you have selected your settings you will be able to construct your meeting invite and registration page. The meeting invite can include the time, required/optional presenters, information about the meeting, location, etc. The key is to potentially allocate some time for the presenters to come on to test mics, cameras, etc. that is different from the time you set on the registration page. (maybe 15-30min earlier)
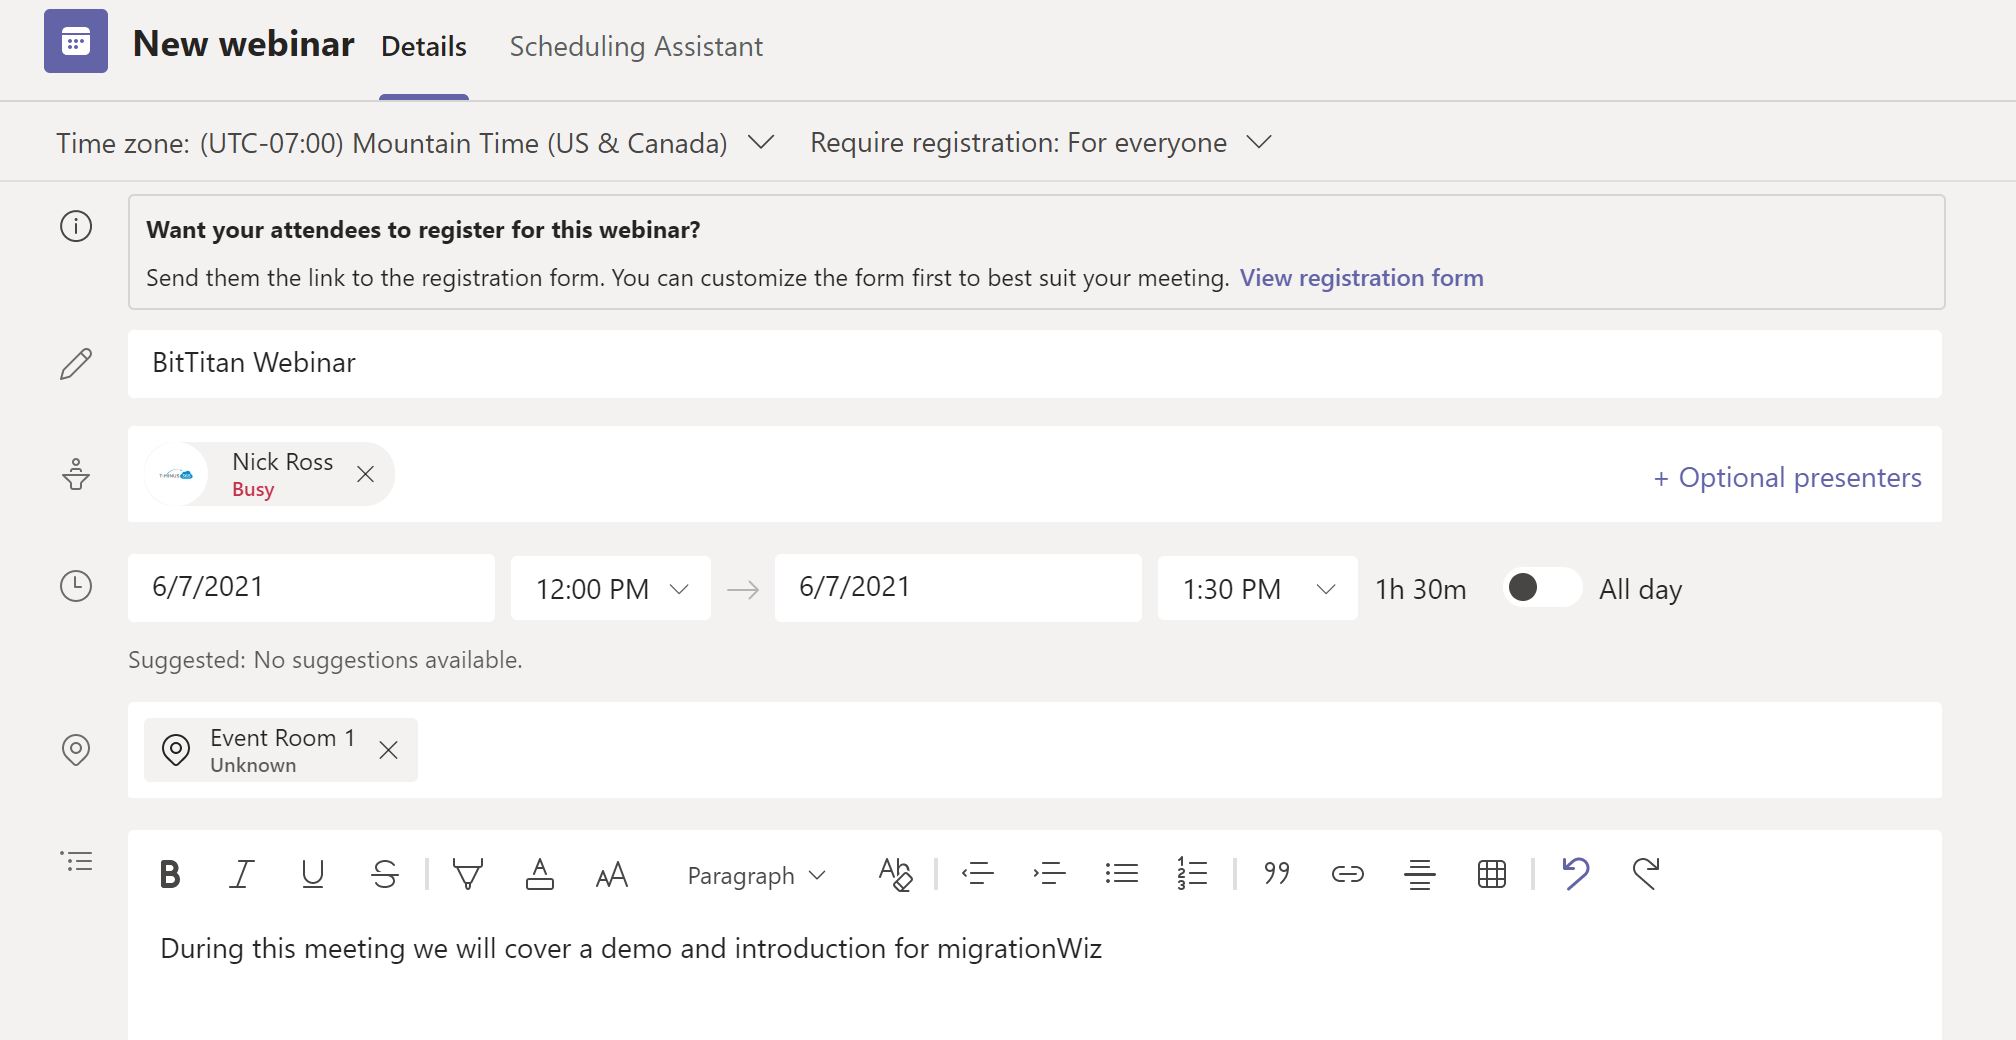
You can click on the registration link to modify the registration page. The registration page is what you can send to third parties, post on social media, etc. so that users can register for the event you schedule. Customizing the registration page includes the following:
- Uploading a banner image
- Including event time and details
- Creating speakers, including their bios
- Adding input fields that are required or optional for registering for the event (includes custom fields)
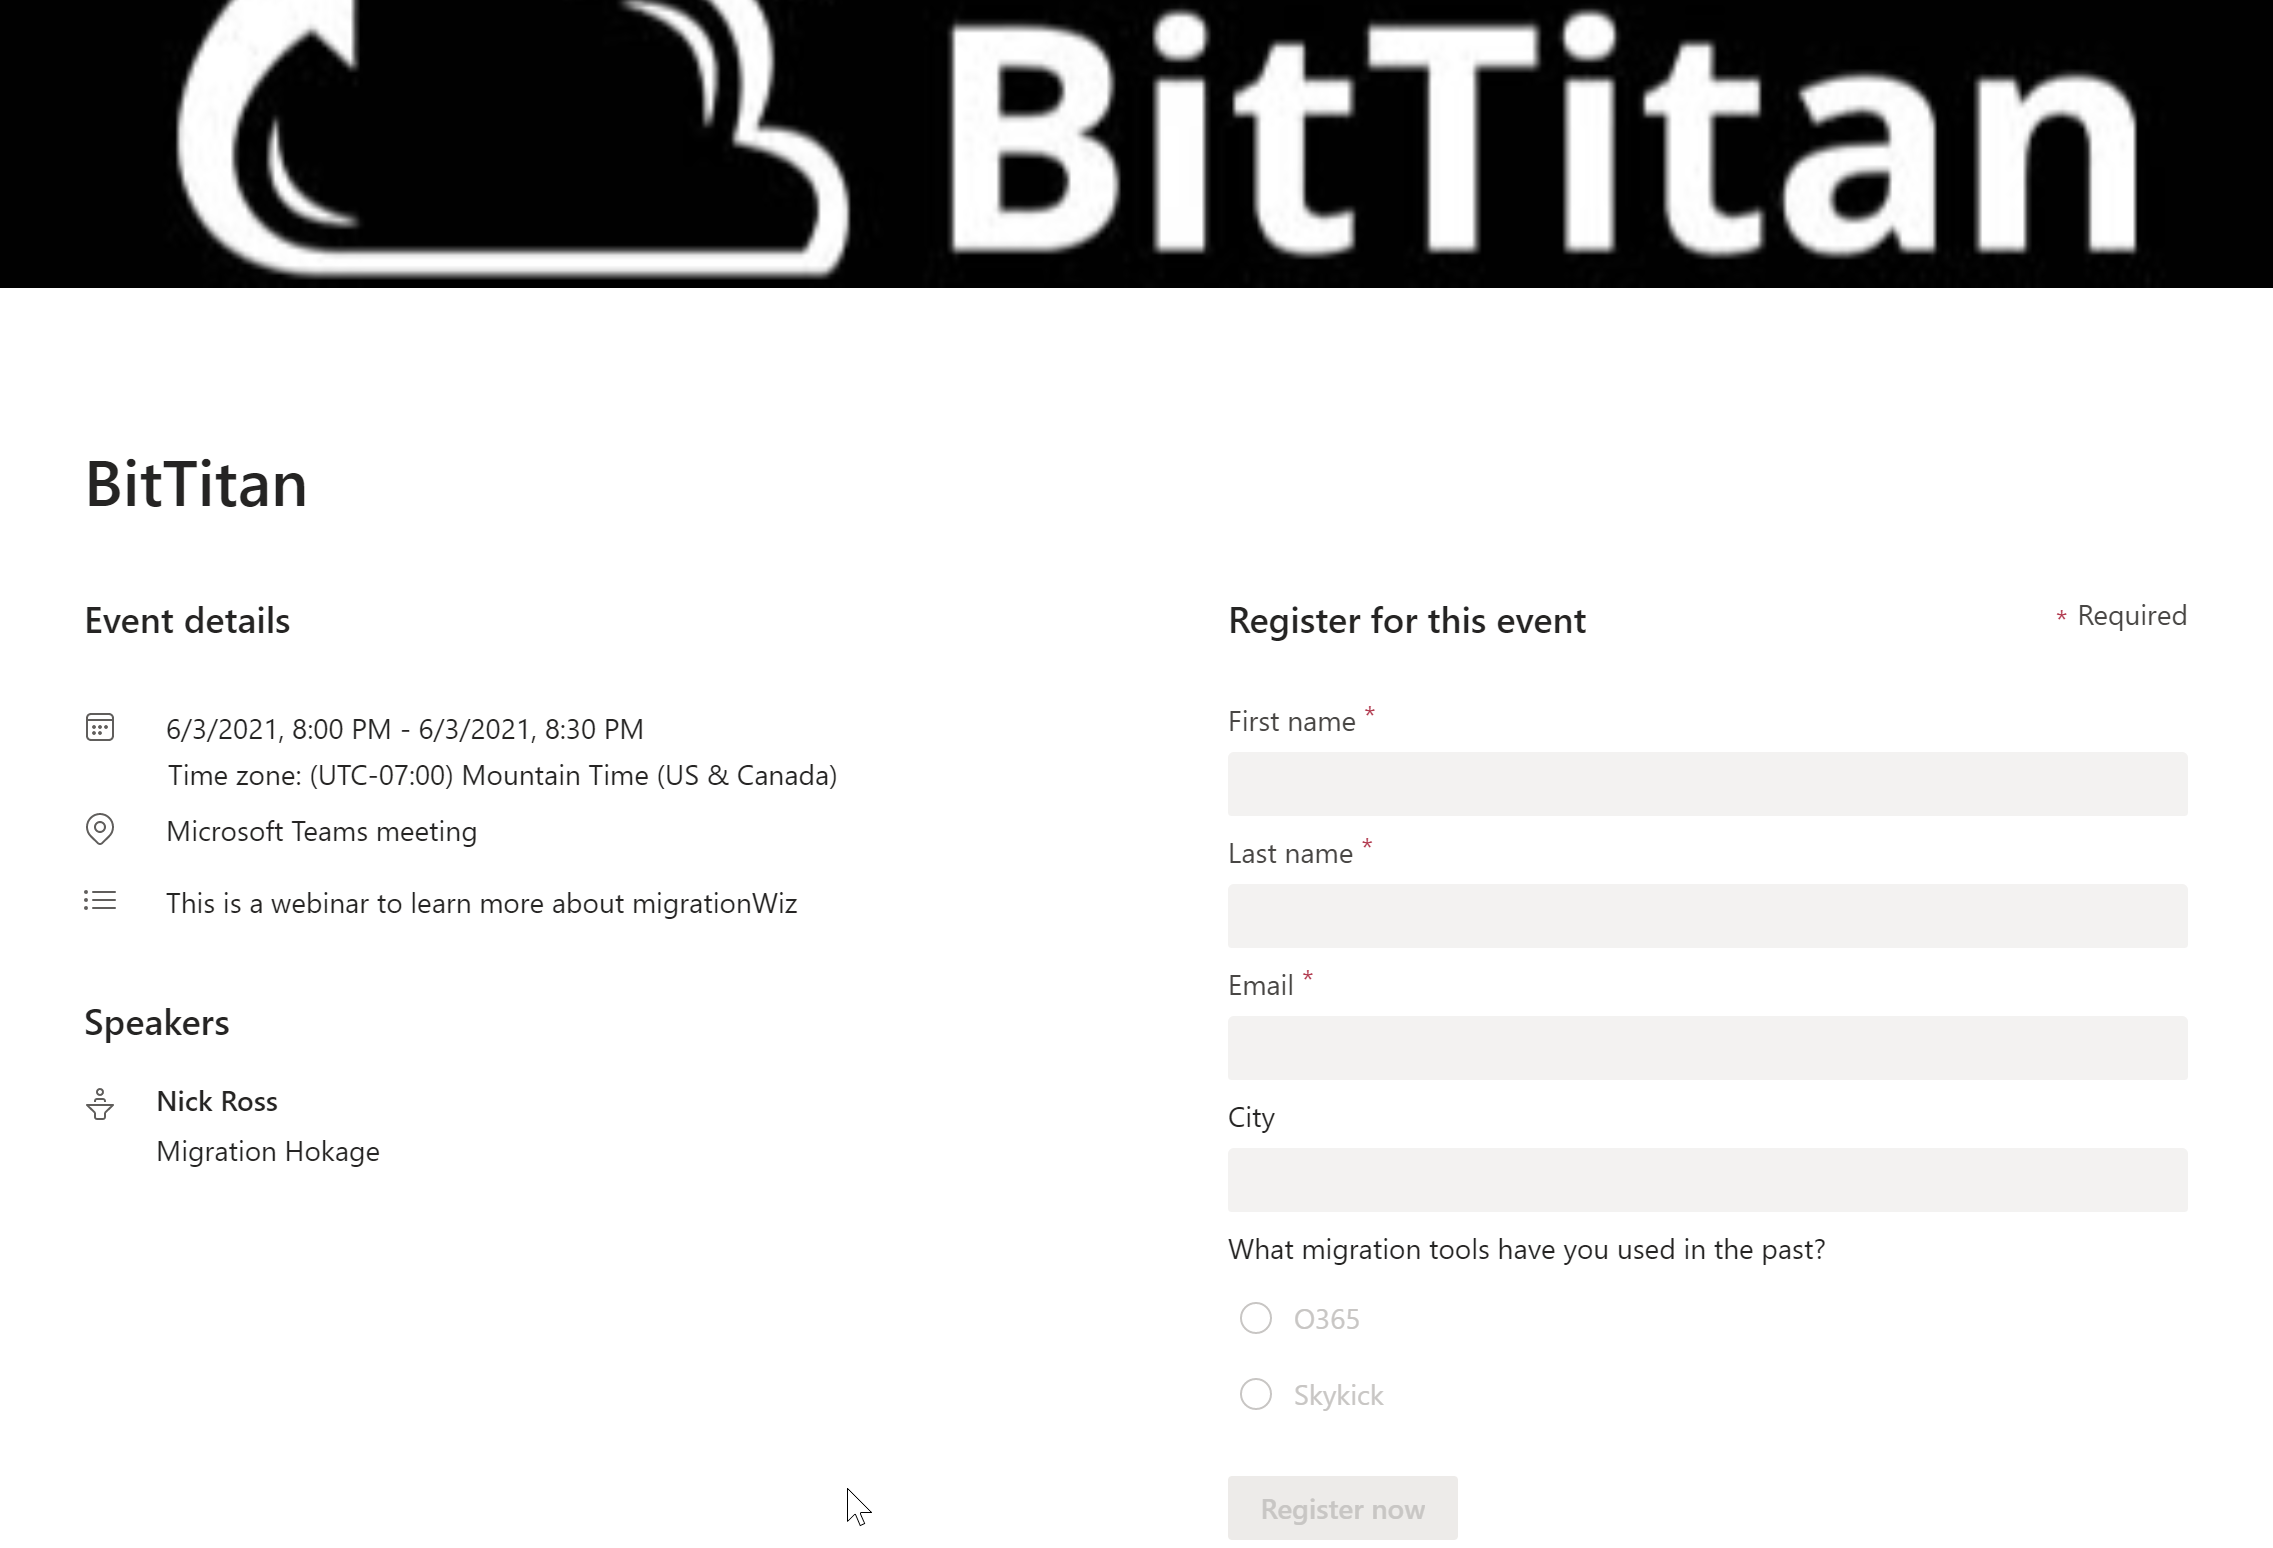
After the event is scheduled and the registration page is finalized, you can copy the registration link to send through email or any social channel
Sharing Examples:
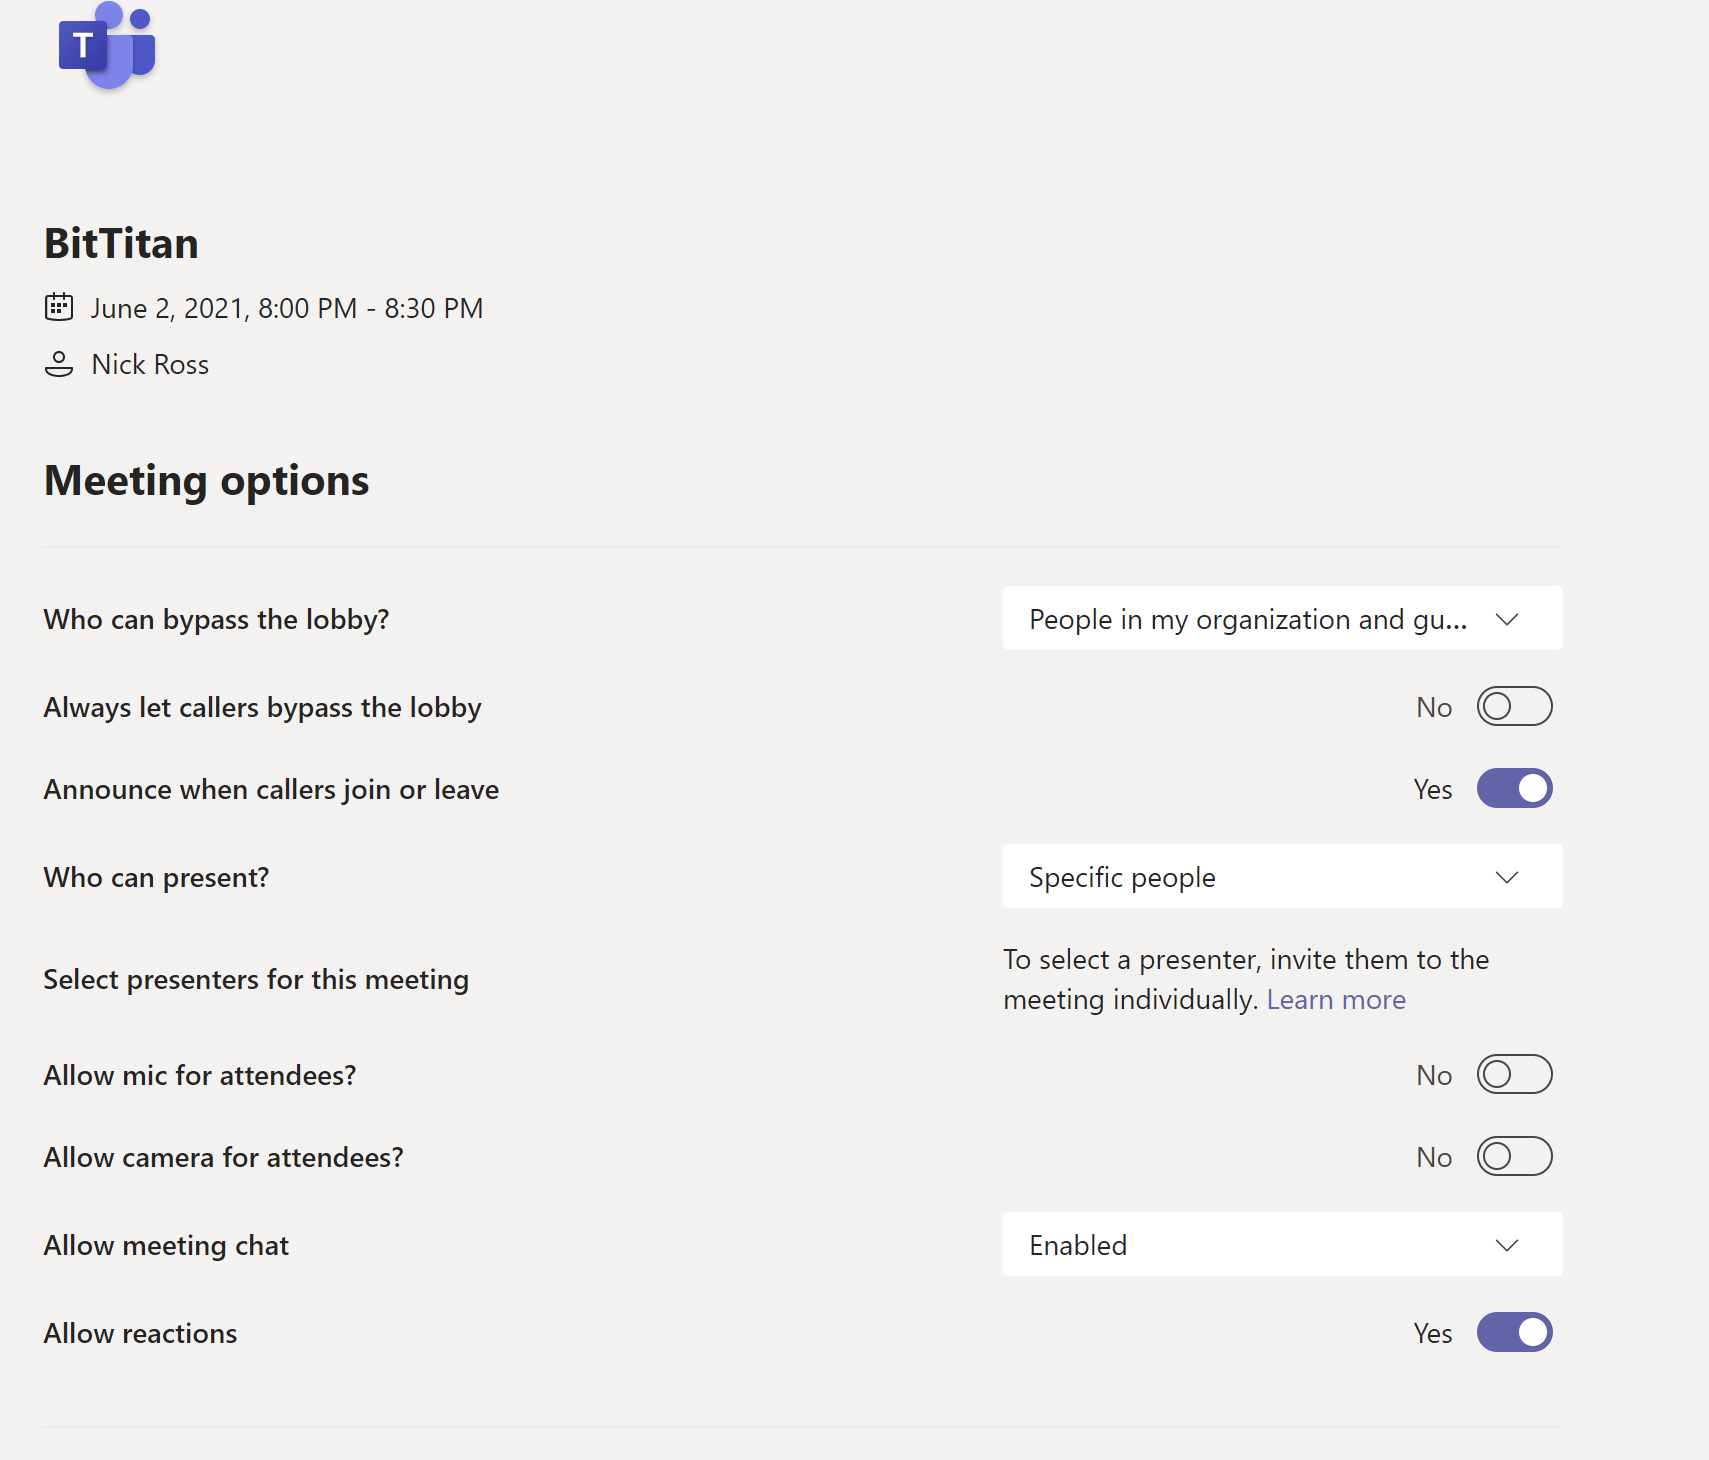
After you send the invite, you are able to click back into the invite to modify the meeting options. These include the following:
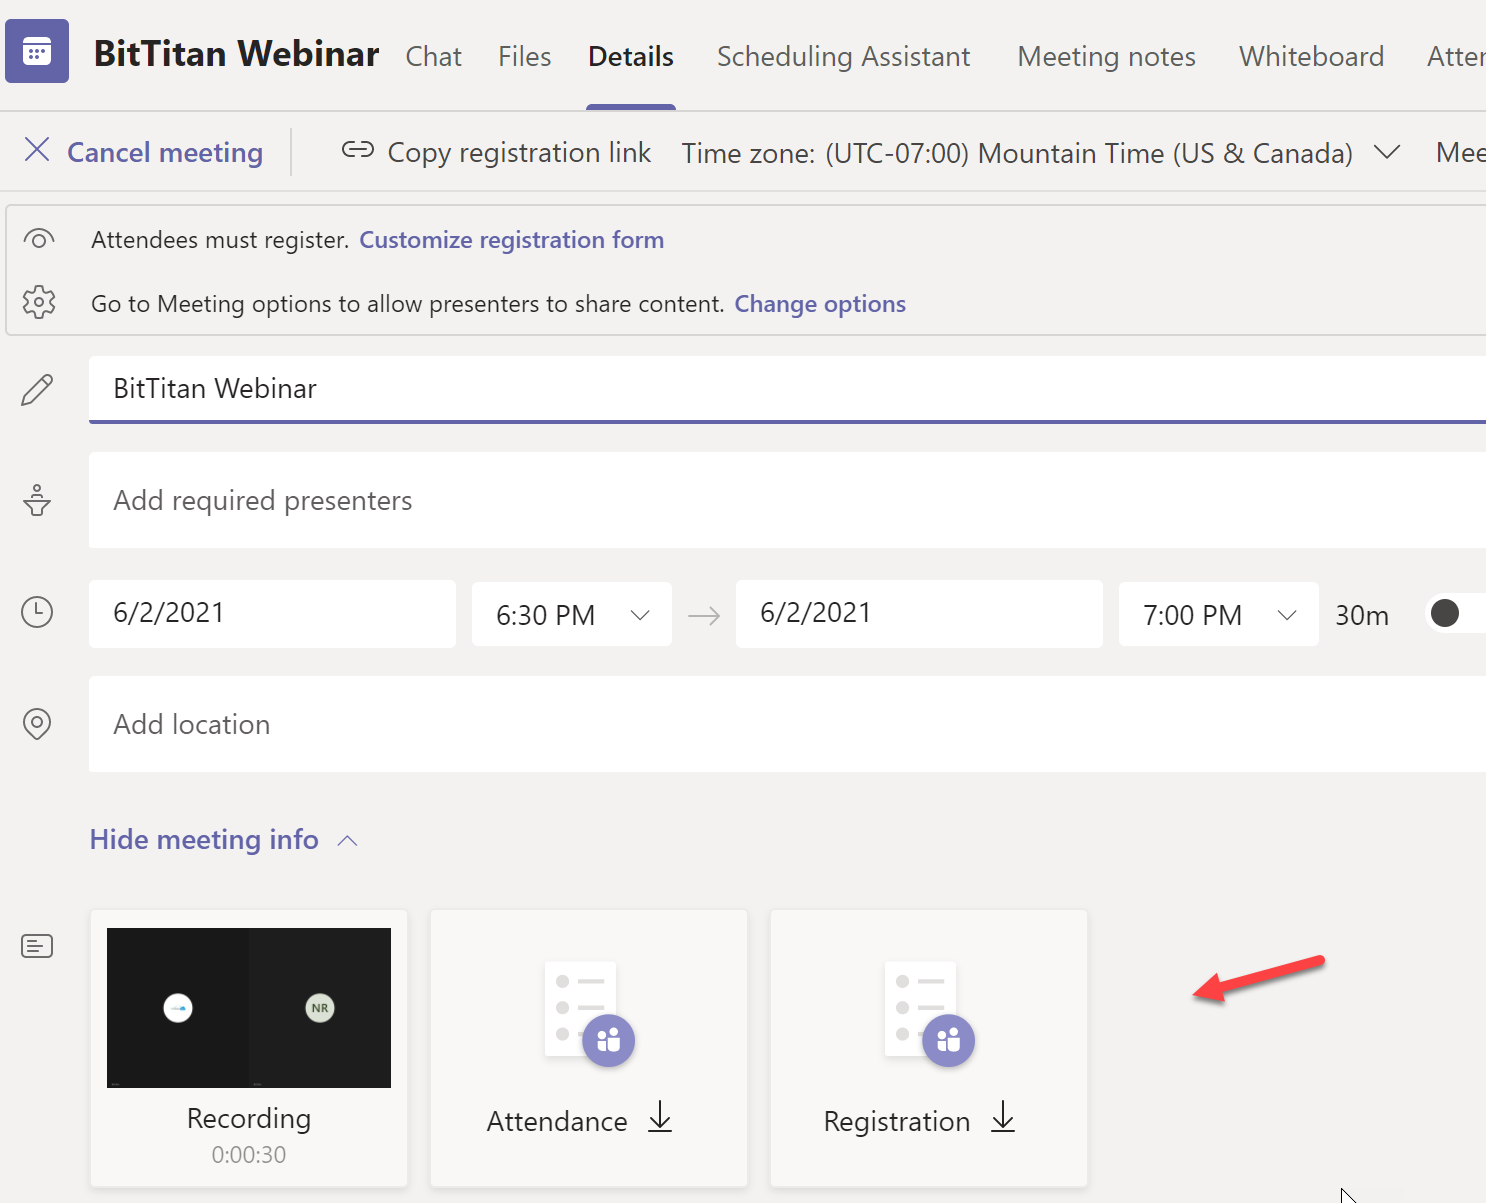
Viewing Registration Details
Before the start date/time of the webinar, you can view registration details as a CSV in the invite. This will include answers to your registration questions you may have asked/required on the registration form.
Conducting the Webinar
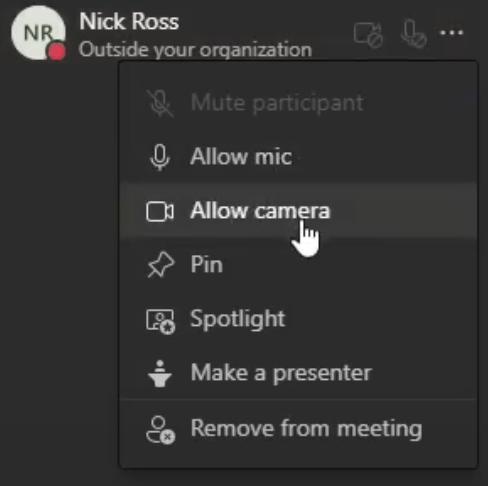
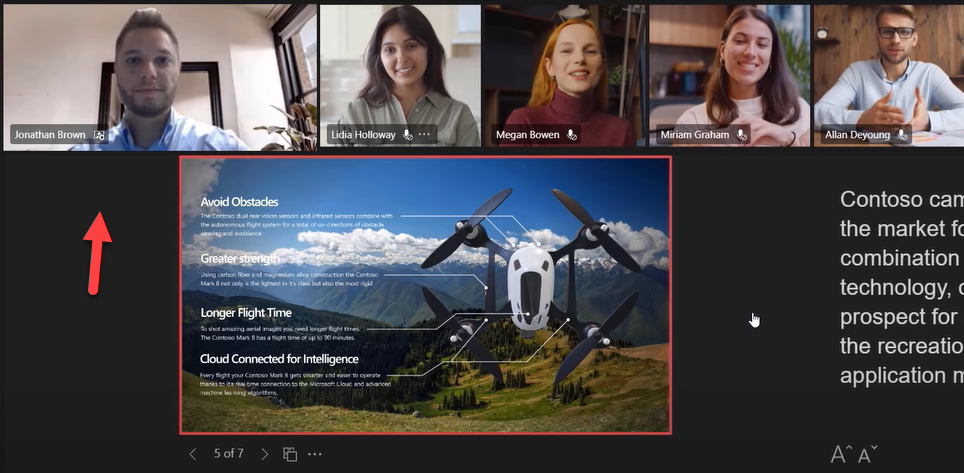
During the webinar, the presenters and attendees have various controls available. As a presenter you can:
- Allow/Disable Mic
- Allow/Disable Camera
- Make an attendee a presenter
- Spotlight an attendee
- Remove an attendee from the meeting
- Create breakout rooms
- Share Screen
- Start Recording
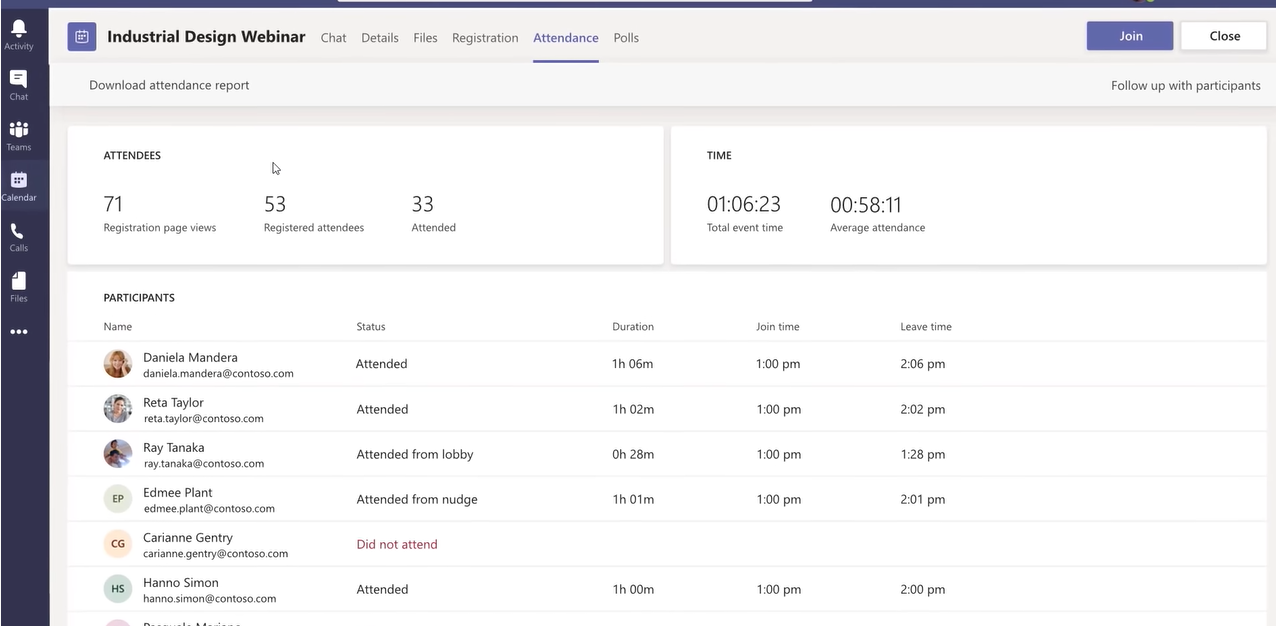
Viewing Attendance
Following the event, an attendance report will be generated which includes all attendees as well as the duration of their stay in your webinar. About a day after the event, you will see the attendance tab generated on the event so that you can consume this information without having to download the CSV
FAQs
Q: How many people can register for an event?
A: With the enterprise or non-profit plans (E3, E5, A3, A5), up to 1,000 interactive attendees can register. After this cap, the meeting supports 20k view-only attendees. For users with a Business subscription, up to 300 interactive attendees are allowed with overflow of 20k view-only attendees as well.
Q: What is the difference between Live Events and Webinars?
A: There are many similarities but at a fundamental level, Live Events are meant to be broadcast without much audience interaction. Teams Webinars are built for more interaction which is why they give you the ability to allow/disallow camera or mic settings, spotlight users, generate breakout rooms, etc. Live Events do not include a registration page of any sort. From a licensing standpoint, business users do not have access to live events but do have access to webinars.
Q: Why can’t I see a dropdown in the Teams calendar to schedule a webinar?
A: Please refer to the beginning of this post. It is likely that you do not have the enterprise plan assigned.
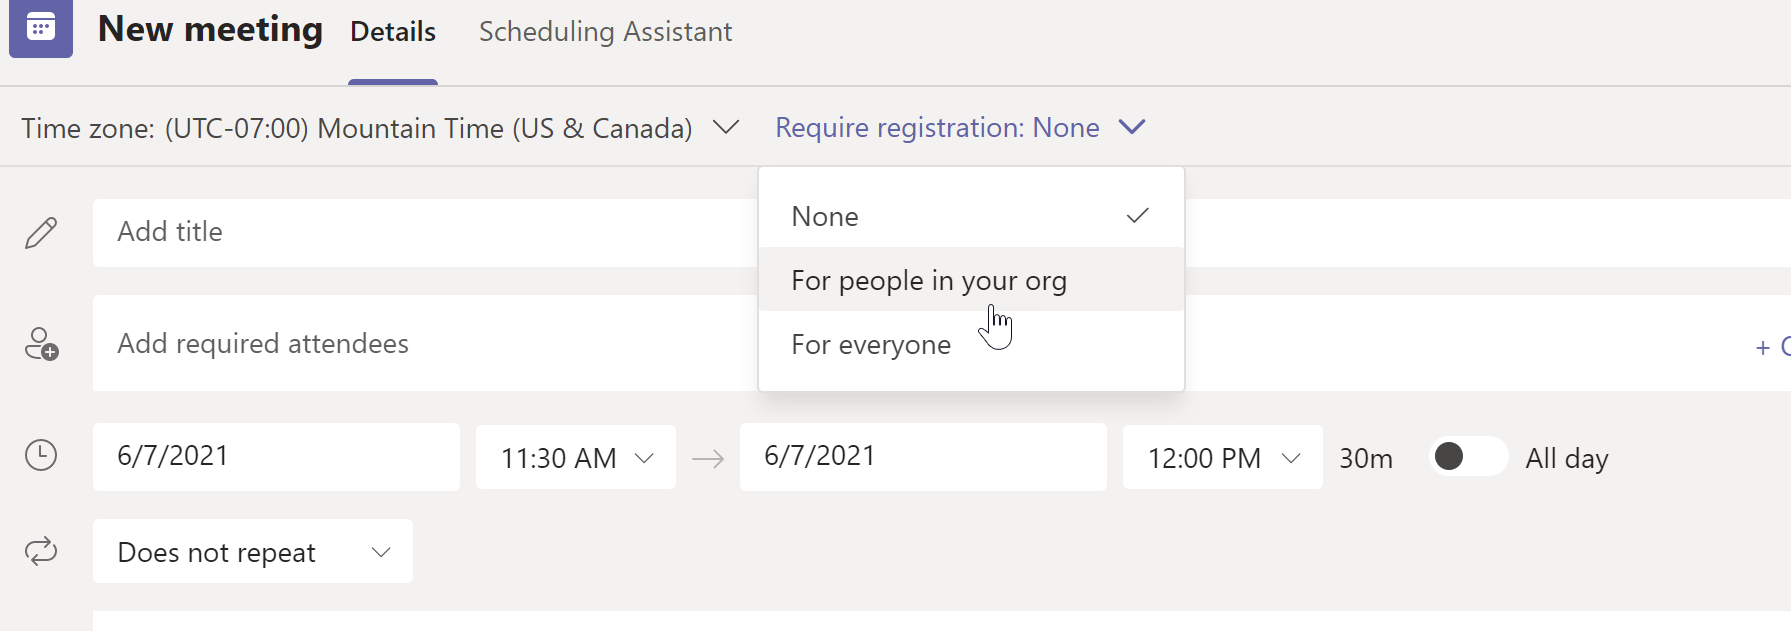
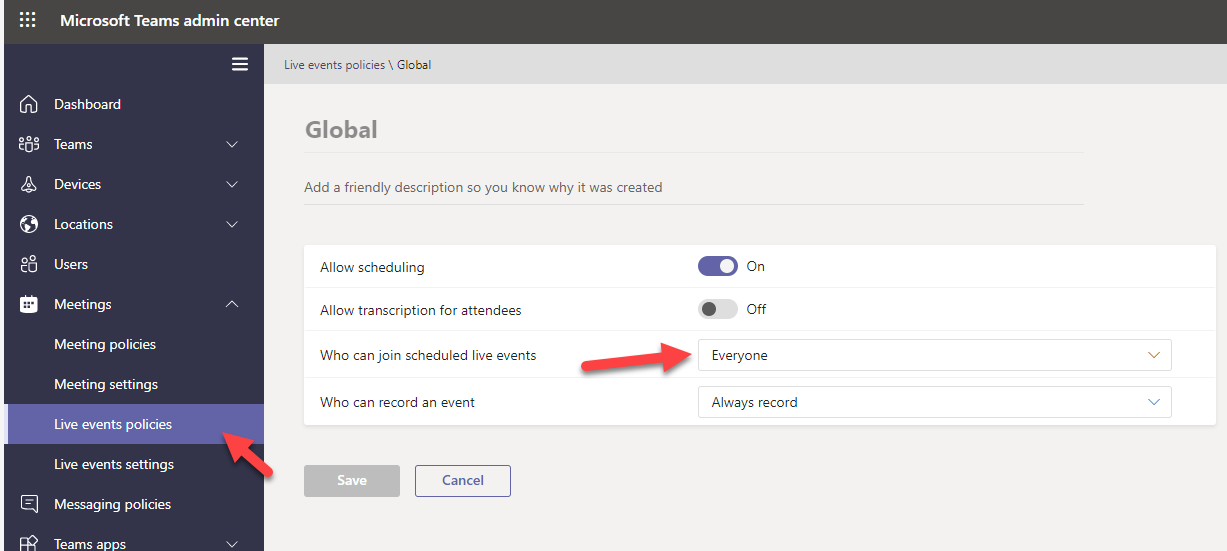
Q: Why can I not select the “For Everyone” option under the registration settings?
A: You need to change the Live Events policy in the Teams admin center. As an admin you can allow users to schedule webinars where people outside the organization can register. To change these settings you need to go to the Teams Admin Center>Click Meetings>Live Event Policies and make sure “Who can join scheduled live events” is set to Everyone.
Q: Why can’t I access the recording of the webinar after the event is over?
A: The recording is saved to the personal OneDrive of the user that started the recording. If you did not change your meeting settings, all external users who leave the webinar will no longer have access to the chat or recording. The user who recorded the meeting would have to take explicit action to share the recording with attendees.
Q: Why can I not spotlight attendees or create breakout rooms?
A: These settings are only available in the client version of Teams. If you are in a web browser, you will not have access to these settings.